One of my favourite sayings is ‘don’t let perfect be the enemy of good’. I think in cyber security, we can all be guilty of striving for perfection. Whether that is your MFA deployment, reducing local admin privilege or whatever your project may be. The reality is, in most larger organizations you will always have exclusions to your policies. There are likely people which require a different set of rules to be applied to them. They key however is to keep making progress while trying to find solutions.
Similarly, if organizational red tape is preventing security policies being rolled out, then initially deploy to those users and systems that won’t be impacted in anyway. I also really love the saying ‘analysis paralysis’ to refer to this in organizations. Organizations can be caught up trying to overengineer solutions that solve every potential fringe use case that they end up making no progress.
Perhaps you have some edge use cases where MFA is difficult to deploy – maybe you have users work in environments where mobile phone usage is banned. That shouldn’t prevent you from deploying MFA to the vast majority of users who do have access to their phone. That isn’t to say you forget about those users, it just doesn’t become a showstopper for any MFA deployment.
If you use Microsoft Sentinel or Advanced Hunting you probably view them as detection platforms, which they definitely are. However, they also provide us with a rich set of data which we can use as a baseline to build and target security policies. Using KQL and the data in these platforms, we can quickly see the impact of our planned policies. We can also use the same data to find especially high-risk accounts, devices or applications to prioritize.

Azure AD Identities
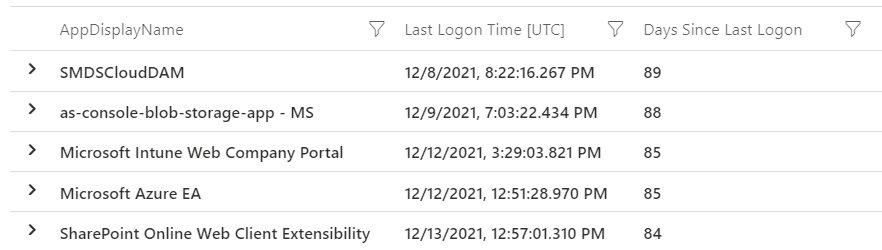
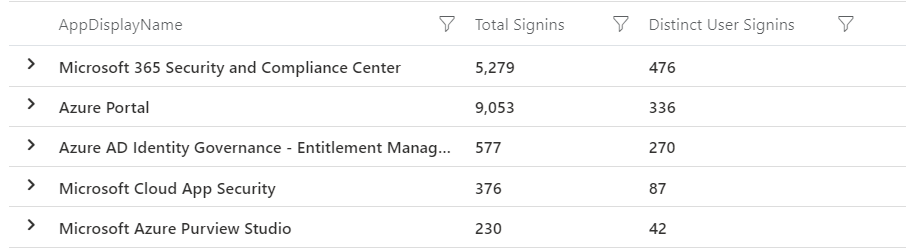
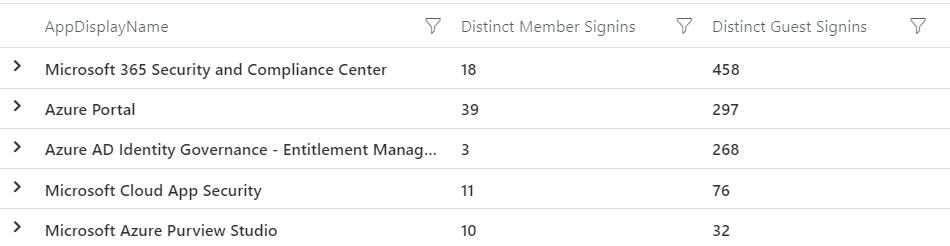
I am sure everyone would love to have MFA everywhere, all the time. The reality is most organizations are still working toward that. As you progress, you may want to target high risk applications. Applications such as control plane management for Azure or Defender services or VPN and remote access portals. Applications with a lot of personal or financial data are always attractive targets for threat actors too. We can use KQL to calculate the percentage of authentications to each application that are covered by MFA.
//Microsoft Sentinel query
SigninLogs
| where TimeGenerated > ago(30d)
| where ResultType == 0
| summarize
    ['Total Signin Count']=count(),
    ['Total MFA Count']=countif(AuthenticationRequirement == "multiFactorAuthentication"),
    ['Total non MFA Count']=countif(AuthenticationRequirement == "singleFactorAuthentication")
    by AppDisplayName
| project
    AppDisplayName,
    ['Total Signin Count'],
    ['Total MFA Count'],
    ['Total non MFA Count'],
   MFAPercentage=(todouble(['Total MFA Count']) * 100 / todouble(['Total Signin Count']))
| sort by ['Total Signin Count'] desc, MFAPercentage asc
//Advanced Hunting query
AADSignInEventsBeta
| where Timestamp > ago(30d)
| where ErrorCode == 0
| summarize
['Total Signin Count']=count(),
['Total MFA Count']=countif(AuthenticationRequirement == "multiFactorAuthentication"),
['Total non MFA Count']=countif(AuthenticationRequirement == "singleFactorAuthentication")
by Application
| project
Application,
['Total Signin Count'],
['Total MFA Count'],
['Total non MFA Count'],
MFAPercentage=(todouble(['Total MFA Count']) * 100 / todouble(['Total Signin Count']))
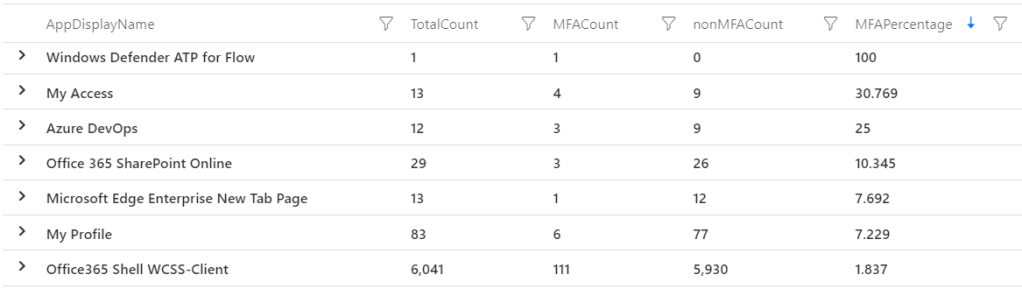
| sort by ['Total Signin Count'] desc, MFAPercentage asc You can then filter that list on particular apps you consider risky, or look for the apps with the worst coverage and start there.
You could alternatively look at it from an identity point of view. Maybe your broader MFA rollout will take a while, but you could enforce MFA across your privileged users straight away. You then get an immediate security benefit by enforcing those controls on your highest risk users. This query finds the MFA percentage for any users with an Azure AD role or ‘admin’ in their username.
//Microsoft Sentinel query
let privusers=
IdentityInfo
| where TimeGenerated > ago(21d)
| summarize arg_max(TimeGenerated, *) by AccountUPN
| where isnotempty(AssignedRoles)
//Look for users who hold a privileged role or who have admin in their title, you may need to update to your naming standards
| where AssignedRoles != "[]" or AccountUPN contains "admin"
| distinct AccountUPN;
SigninLogs
| where TimeGenerated > ago(30d)
| where ResultType == 0
| where UserPrincipalName in~ (privusers)
| summarize
['Total Signin Count']=count(),
['Total MFA Count']=countif(AuthenticationRequirement == "multiFactorAuthentication"),
['Total non MFA Count']=countif(AuthenticationRequirement == "singleFactorAuthentication")
by UserPrincipalName
| project
UserPrincipalName,
['Total Signin Count'],
['Total MFA Count'],
['Total non MFA Count'],
MFAPercentage=(todouble(['Total MFA Count']) * 100 / todouble(['Total Signin Count']))
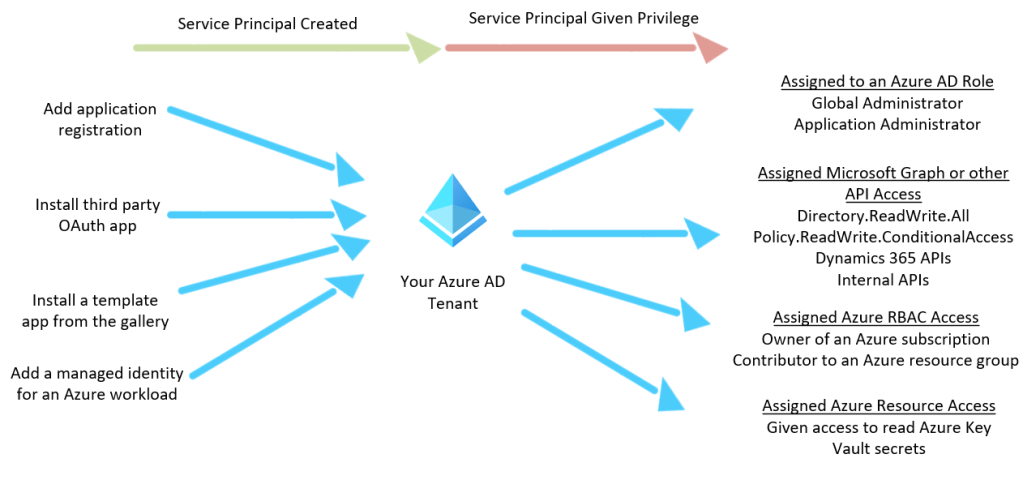
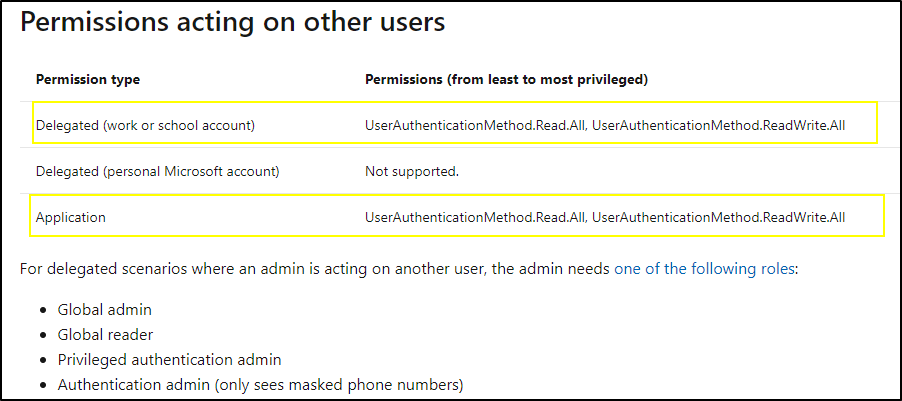
| sort by MFAPercentage asc Another improvement you can make to your identity security is to migrate from weaker MFA methods to stronger ones. This diagram from the Microsoft docs is a great example of this. We know that any MFA is better than no MFA, but we also know that apps like the Authenticator app or going passwordless is even better.

With Microsoft Sentinel if we query our Azure AD sign in data, we can find which users are only using text message. The fact is those users are already doing some kind of MFA, so perhaps some targeted training for those users to get them to move up to a better method. The Authenticator app or passwordless technologies have always been a really easy sell for me. In cyber security we don’t always have solutions that are both more secure and a better user experience. So, when we do run across them, like passwordless, we should embrace them. The following query (available only in Sentinel) will find those users who have only used text message as their MFA method.
//Microsoft Sentinel query
SigninLogs
| where TimeGenerated > ago(30d)
//You can exclude guests if you want, they may be harder to move to more secure methods, comment out the below line to include all users
| where UserType == "Member"
| mv-expand todynamic(AuthenticationDetails)
| extend ['Authentication Method'] = tostring(AuthenticationDetails.authenticationMethod)
| where ['Authentication Method'] !in ("Previously satisfied", "Password", "Other")
| where isnotempty(['Authentication Method'])
| summarize
    ['Count of distinct MFA Methods']=dcount(['Authentication Method']),
    ['List of MFA Methods']=make_set(['Authentication Method'])
    by UserPrincipalName
//Find users with only one method found and it is text message
| where ['Count of distinct MFA Methods'] == 1 and ['List of MFA Methods'] has "text"
Another win you can get in Azure AD is to find users who are trying to use the self-service password reset functionality but failing. The logging for SSPR is really verbose so we get great insights from the data. For instance, we can find users who are attempting to reset their password but don’t have a phone number registered. This is a good chance to reach out to those users and get them enrolled fully – the new combined registration lets them get enrolled into MFA at the same time. Guide them through onboarding the Authenticator app over text message!
AuditLogs
| where LoggedByService == "Self-service Password Management"
| extend User = tostring(parse_json(tostring(InitiatedBy.user)).userPrincipalName)
| extend ['User IP Address'] = tostring(parse_json(tostring(InitiatedBy.user)).ipAddress)
| sort by TimeGenerated asc
| summarize ['SSPR Actions']=make_list(ResultReason) by CorrelationId, User, ['User IP Address']
| where ['SSPR Actions'] has "User's account has insufficient authentication methods defined. Add authentication info to resolve this"
| sort by User desc
Another SSPR query that is helpful; you can find users who are getting stuck during the password reset flow. There is nothing more annoying for a user that is trying to do the right thing but getting stuck. This query will find users who are attempting to reset their password but failing multiple times – possibly due to password complexity requirements. If you are making progress to deploying passwordless technologies, these users may be a good fit.
AuditLogs
| where LoggedByService == "Self-service Password Management"
| extend User = tostring(parse_json(tostring(InitiatedBy.user)).userPrincipalName)
| extend ['User IP Address'] = tostring(parse_json(tostring(InitiatedBy.user)).ipAddress)
| sort by TimeGenerated asc
| summarize ['SSPR Actions']=make_list_if(ResultReason, ResultReason has "User submitted a new password") by CorrelationId, User, ['User IP Address']
| where array_length(['SSPR Actions']) >= 3
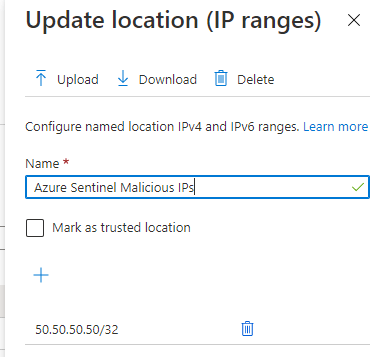
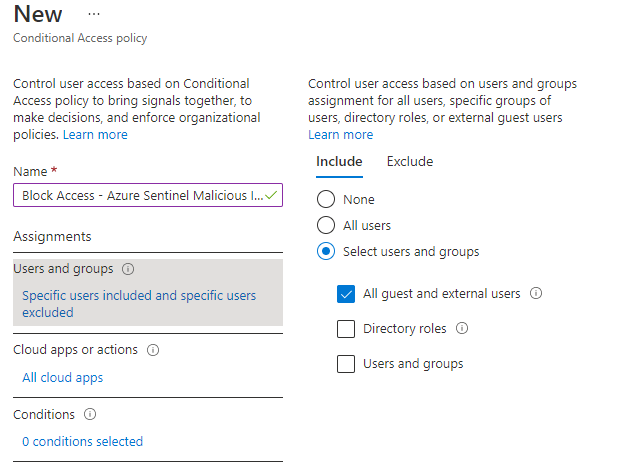
| sort by User desc It wouldn’t be a post about Azure AD without a legacy authentication query. Microsoft is beginning to disable legacy auth in Exchange Online (starting October 1). However, you should still block legacy auth in Conditional Access, because it is used in other places other than Exchange. The easiest place to start is simply build a Conditional Access policy and block it for those users that have never used legacy auth. If they aren’t using it already, then don’t let them (or an attacker) start using it. You could achieve this a number of ways, but in my opinion the easiest is just to create a list of all your identities. From that, we can find those that have not used legacy auth in the last 30 days.
//Microsoft Sentinel query
let legacyauthusers=
SigninLogs
| where TimeGenerated > ago(30d)
| where ResultType == 0
| where ClientAppUsed !in ("Mobile Apps and Desktop clients", "Browser")
| distinct UserPrincipalName;
IdentityInfo
| where TimeGenerated > ago(30d)
| summarize arg_max(TimeGenerated, *) by AccountCloudSID
| where UserType == "Member"
| distinct AccountUPN
| where isnotempty(AccountUPN)
| where AccountUPN !in~ (legacyauthusers)
//Advanced Hunting query
let legacyauthusers=
AADSignInEventsBeta
| where ErrorCode == 0
| where ClientAppUsed !in ("Mobile Apps and Desktop clients", "Browser")
| distinct AccountUpn;
IdentityInfo
| distinct AccountUpn
| where isnotempty( AccountUpn)
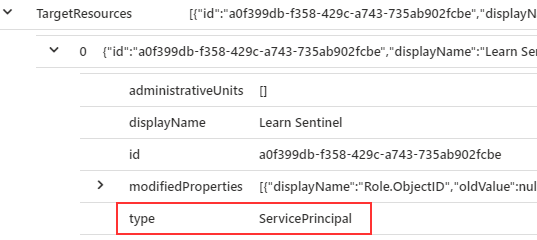
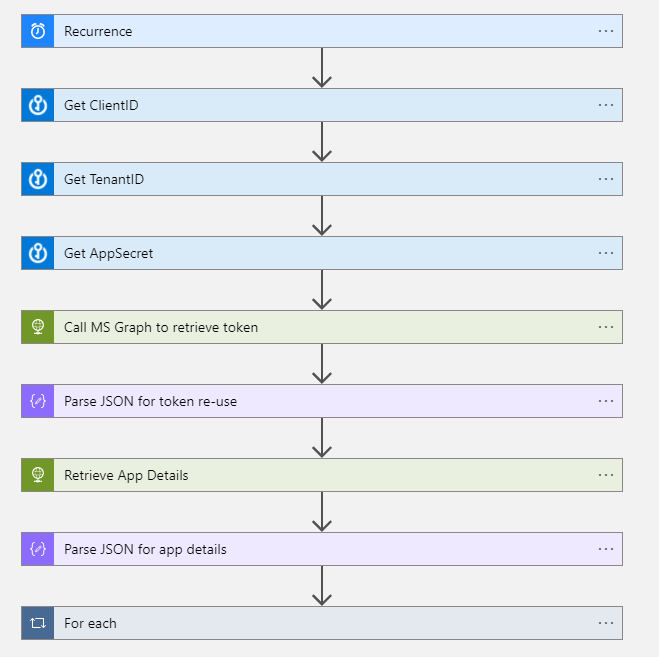
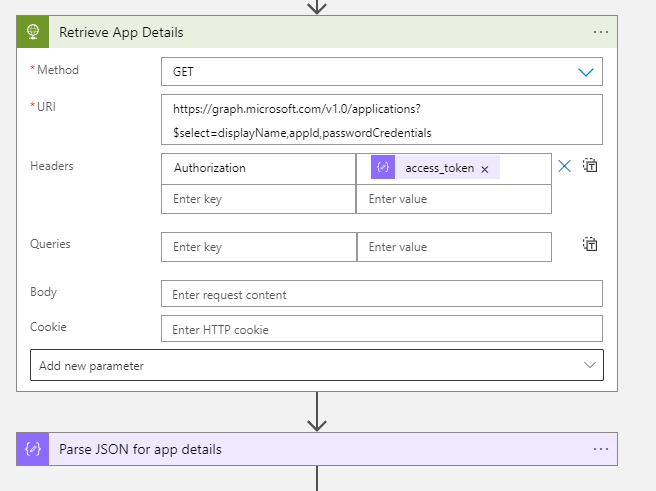
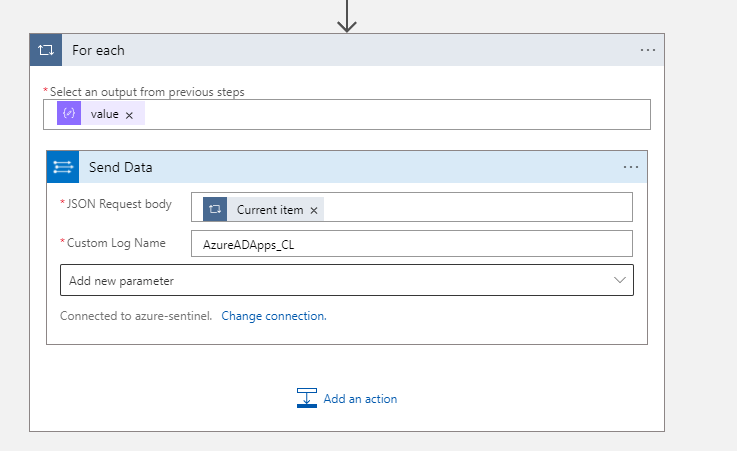
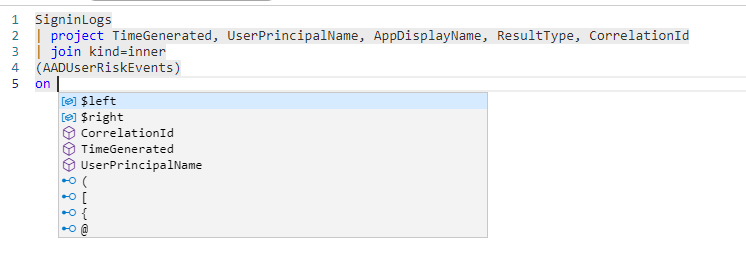
| where AccountUpn !in (legacyauthusers)Azure AD Conditional Access for workload identities allows us to control which IP addresses our Azure AD service principals connect from. Depending on the nature of your service principals, they may change IP addresses a lot, or they may be quite static. We can use both Advanced Hunting and Microsoft Sentinel to find a list of service principals that are only connecting from a single IP address. You can then use this data to build out Conditional Access policies. If one of those service principals is then compromised and a threat actor connects from elsewhere, they will be blocked. The data for this query is held in the AADSpnSignInEventsBeta in Advanced Hunting (requires Azure AD P2) or AADServicePrincipalSignInLogs in Microsoft Sentinel (assuming you have the data ingesting).
//Microsoft Sentinel query
let appid=
    AADServicePrincipalSignInLogs
    | where TimeGenerated > ago (30d)
    | where ResultType == 0
    | summarize dcount(IPAddress) by AppId
    | where dcount_IPAddress == 1
    | distinct AppId;
AADServicePrincipalSignInLogs
| where TimeGenerated > ago (30d)
| where ResultType == 0
| where AppId in (appid)
| summarize ['Application Id']=make_set(AppId) by IPAddress, ServicePrincipalName
//Advanced Hunting query
let appid=
AADSpnSignInEventsBeta
| where Timestamp > ago (30d)
| where ErrorCode == 0
| where IsManagedIdentity == 0
| summarize dcount(IPAddress) by ApplicationId
| where dcount_IPAddress == 1
| distinct ApplicationId;
AADSpnSignInEventsBeta
| where Timestamp > ago (30d)
| where ErrorCode == 0
| where ApplicationId in (appid)
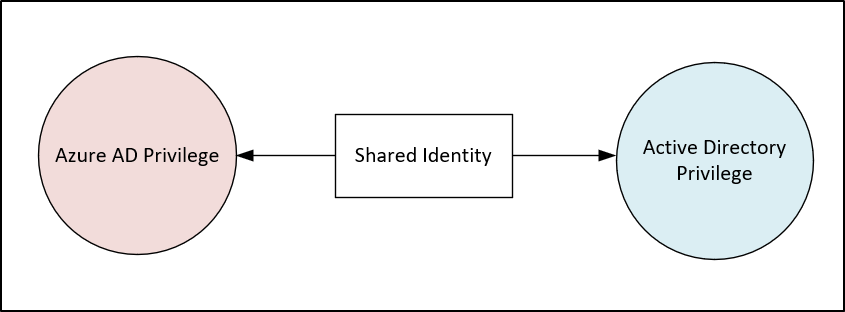
| summarize ['Application Id']=make_set(ApplicationId) by IPAddress, ServicePrincipalNameLocal Admin Access & Lateral Movement
When attackers compromise a workstation, the user they initially breach my not have a lot of privilege. A threat actor will try to move laterally and escalate privilege from that initial foothold. We can try to reduce privilege credentials being left on devices by using tools like LAPS and not using domain admin level accounts when accessing end user workstations. Unless you have some kind of privileged access management software that enforces these behaviors though, chances are privileged credentials are being left on a number of devices. We can use Defender and Sentinel data to try and target the most vulnerable devices and users.
For instance, this query will summarize logons to your devices where the user has local admin rights. From that list we sort our devices by those that have the most unique accounts signing in with local admin privilege. If an attacker was to compromise one of these, then there is a chance they can get access to the credentials for all the users who have logged on using mimikatz or something similar.
//Microsoft Sentinel query
DeviceLogonEvents
| where TimeGenerated > ago(30d)
| project DeviceName, ActionType, LogonType, AdditionalFields, InitiatingProcessCommandLine, AccountName, IsLocalAdmin
| where ActionType == "LogonSuccess"
| where LogonType in ("Interactive","RemoteInteractive")
| where AdditionalFields.IsLocalLogon == true
| where InitiatingProcessCommandLine == "lsass.exe"
| summarize
    ['Local Admin Distinct User Count']=dcountif(AccountName,IsLocalAdmin == "true"),
    ['Local Admin User List']=make_set_if(AccountName, IsLocalAdmin == "true")
    by DeviceName
| sort by ['Local Admin Distinct User Count']
//Advanced Hunting query
DeviceLogonEvents
| where Timestamp > ago(30d)
| project DeviceName, ActionType, LogonType, AdditionalFields, InitiatingProcessCommandLine, AccountName, IsLocalAdmin
| where ActionType == "LogonSuccess"
| where LogonType in ("Interactive","RemoteInteractive")
| where IsLocalAdmin == true
| where InitiatingProcessCommandLine == "lsass.exe"
| summarize
['Local Admin Distinct User Count']=dcountif(AccountName,IsLocalAdmin == "true"),
['Local Admin User List']=make_set_if(AccountName, IsLocalAdmin == "true")
by DeviceName
| sort by ['Local Admin Distinct User Count'] desc If we run the same query again, we can reverse our summary. This time we find the accounts which have logged onto the most devices as local admin. This will show us our accounts with the largest blast radius. If one of these accounts is compromised, then the attacker would also have local admin access to all the devices listed.
//Microsoft Sentinel query
DeviceLogonEvents
| where TimeGenerated > ago(30d)
| project DeviceName, ActionType, LogonType, AdditionalFields, InitiatingProcessCommandLine, AccountName, IsLocalAdmin
| where ActionType == "LogonSuccess"
| where LogonType in ("Interactive","RemoteInteractive")
| where AdditionalFields.IsLocalLogon == true
| where InitiatingProcessCommandLine == "lsass.exe"
| summarize
    ['Local Admin Distinct Device Count']=dcountif(DeviceName,IsLocalAdmin == "true"),
    ['Local Admin Device List']=make_set_if(DeviceName, IsLocalAdmin == "true")
    by AccountName
| sort by ['Local Admin Distinct Device Count'] desc
//Advanced Hunting query
DeviceLogonEvents
| where Timestamp > ago(30d)
| project DeviceName, ActionType, LogonType, AdditionalFields, InitiatingProcessCommandLine, AccountName, IsLocalAdmin
| where ActionType == "LogonSuccess"
| where LogonType in ("Interactive","RemoteInteractive")
| where IsLocalAdmin == true
| where InitiatingProcessCommandLine == "lsass.exe"
| summarize
['Local Admin Distinct Device Count']=dcountif(DeviceName,IsLocalAdmin == "true"),
['Local Admin Device List']=make_set_if(DeviceName, IsLocalAdmin == "true")
by AccountName
| sort by ['Local Admin Distinct Device Count'] desc You can use this same data to hunt for service accounts that are logging into devices. In a perfect world that doesn’t happen of course, but the reality is some software vendors make products where it is required. You may find that IT admins are being lazy and just using those service accounts everywhere though. They often won’t have controls like MFA and possibly have a worse password. For an attacker, service accounts are gold, since the monitoring around them is often weak.
//Microsoft Sentinel query
DeviceLogonEvents
| where TimeGenerated > ago(30d)
| project DeviceName, ActionType, LogonType, AdditionalFields, InitiatingProcessCommandLine, AccountName, IsLocalAdmin
| where ActionType == "LogonSuccess"
| where LogonType in ("Interactive","RemoteInteractive")
| where AdditionalFields.IsLocalLogon == true
| where InitiatingProcessCommandLine == "lsass.exe"
//Search only for accounts starting with svc or containing service. You may need to substitute in your service account naming standard.
| where AccountName startswith "svc" or AccountName contains "service"
| summarize
    ['Local Admin Distinct Device Count']=dcountif(DeviceName,IsLocalAdmin == "true"),
    ['Local Admin Device List']=make_set_if(DeviceName, IsLocalAdmin == "true")
    by AccountName
| sort by ['Local Admin Distinct Device Count'] desc
Once you have your list, you can then start to enforce what machines they can access. If svc.sqlapp only needs to logon to 2 machines, then just configure that in Active Directory. You can then alert on activity outside of that which may be malicious.
If you don’t use Defender for Endpoint you can use the Windows security event log to achieve a similar summary. For instance, you can find the devices with the most users connecting via RDP. Then you can reverse that query and find the users connecting to the most devices. Just like our Defender data.
//Microsoft Sentinel query
SecurityEvent
| where TimeGenerated > ago(30d)
| where EventID == "4624"
| where LogonType == 10
//Extend new column that drops Account to lower case so users are correctly summarized, i.e User123 and user123 are combined
| extend AccountName=tolower(Account)
| summarize
    ['Count of Users']=dcount(AccountName),
    ['List of Users']=make_set(AccountName)
    by Computer
| sort by ['Count of Users'] desc
//Microsoft Sentinel query
SecurityEvent
| where TimeGenerated > ago(30d)
| where EventID == "4624"
| where LogonType == 10
//Extend new column that drops Account to lower case so users are correctly summarized, i.e User123 and user123 are combined
| extend AccountName=tolower(Account)
| summarize
['Count of Computers']=dcount(Computer),
['List of Computers']=make_set(Computer)
by AccountName
| sort by ['Count of Computers'] desc Attack surface reduction rules
Attack surface reduction (ASR) rules are a really great feature of Defender that help protect your device against certain behaviours. Instead of targeting particular malicious files (which Defender still does of course), they instead block against behaviour. For instance, ASR may block a file that when executed attempts to connect to the internet and download further files. IT and cyber security departments are often wary of these rules impacting users negatively. There are still lots of ways to get some quick wins with ASR, without stopping users from being able to work. If you are evaluating ASR then you should absolutely put the rules into audit mode. This will write an event to Advanced Hunting and Sentinel each time a rule would have blocked a file or program if block mode was enabled. Once you have done that, you have a great set of data to start making progress.
The following query will find machines that have triggered no ASR rules over the last 30 days. These machines would be a good starting point to enable ASR in block mode. You have the data showing they haven’t triggered any rules in the last 30 days.
//Microsoft Sentinel query
//First find devices that have triggered an Attack Surface Reduction rule, either block or in audit mode.
let asrdevices=
    DeviceEvents
    | where TimeGenerated > ago (30d)
    | where ActionType startswith "Asr"
    | distinct DeviceName;
//Find all devices and exclude those that have previously triggered a rule
DeviceInfo
| where TimeGenerated > ago (30d)
| where OSPlatform startswith "Windows"
| summarize arg_max(TimeGenerated, *) by DeviceName
| where DeviceName !in (asrdevices)
| project
    ['Time Last Seen']=TimeGenerated,
    DeviceId,
    DeviceName,
    OSPlatform,
    OSVersion,
    LoggedOnUsers
//First find devices that have triggered an Attack Surface Reduction rule, either block or in audit mode.
let asrdevices=
DeviceEvents
| where Timestamp > ago (30d)
| where ActionType startswith "Asr"
| distinct DeviceName;
//Find all devices and exclude those that have previously triggered a rule
DeviceInfo
| where Timestamp > ago (30d)
| where OSPlatform startswith "Windows"
| summarize arg_max(Timestamp, *) by DeviceName
| where DeviceName !in (asrdevices)
| project
['Time Last Seen']=Timestamp,
DeviceId,
DeviceName,
OSPlatform,
OSVersion,
LoggedOnUsersYou can also summarize your ASR audit data. The following query will list the total count, distinct device count and the list of devices for each rule that is being triggered.
//Microsoft Sentinel query
DeviceEvents
| where TimeGenerated > ago(30d)
| where ActionType startswith "Asr"
| where isnotempty(InitiatingProcessCommandLine)
| summarize ['ASR Hit Count']=count(), ['Device Count']=dcount(DeviceName), ['Device List']=make_set(DeviceName) by ActionType, InitiatingProcessCommandLine
| sort by ['ASR Hit Count'] desc
//Advanced Hunting query
DeviceEvents
| where Timestamp > ago(30d)
| where ActionType startswith "Asr"
| where isnotempty(InitiatingProcessCommandLine)
| summarize ['ASR Hit Count']=count(), ['Device Count']=dcount(DeviceName), ['Device List']=make_set(DeviceName) by ActionType, InitiatingProcessCommandLine
| sort by ['ASR Hit Count'] desc It also lists the process command line that flagged the rule. From that list you can see if you have any common software or processes across your devices triggering ASR hits. If you have a particular vendor piece of software that is flagging ASR rules across all your devices, you can reach out to the vendor for an update. Alternatively, you could look at excluding that particular rule and process combination. In the perfect world, we would have no exclusions to AV or EDR, but if you are dealing with legacy software or other tech debt that may not be realistic. I would personally rather have ASR enabled with a small exclusion list, than not have it on at all. With KQL you can help build those rules out with minimal disruption to your users.
These are just a few examples of analyzing the data you have to try and improve your security hygiene. Remember, you don’t need to perfect, there is no such thing as 100% secure. Attacks are constantly evolving. Use the tools and data you have today to make meaningful progress to reducing risk.